Introduction
Are you looking for a fun and easy DIY project? Look no further! In this article, we’ll show you how to build a tabletop cornhole game that will bring hours of entertainment to your game nights. Not only is this miniature version of the classic game incredibly fun to play, but it’s also a great gift idea for those hard-to-buy-for people on your Christmas list. Let’s get started!
The Perfect DIY Gift
Searching for the perfect DIY gift? Look no further! This tabletop cornhole game is a fantastic present for just about anyone. Whether they’re a dad, teen, kid, family member, neighbor, or teacher, they’re sure to love this fun and interactive game. Plus, it’s an excellent way to enjoy outdoor games even when the weather isn’t cooperating. Trust us, this game will keep you and your loved ones entertained for hours on end!
Customizable Board Decor
One of the best parts of any cornhole game is the ability to customize the board decor. With this tabletop cornhole game, you can let your creativity shine! Whether you want to pay tribute to a special place or simply add some classic stripes, the choice is yours. Get crafty with paint, vinyl, or any other materials that tickle your fancy. Make it unique and personalized!
Integrated Scoreboard
Want to keep track of your score easily? The tabletop cornhole game features an integrated scoreboard right in the center of the board. Don’t worry; it’s easier to make than it looks! By drilling a series of 5mm holes and using scoring pegs made from straight self-pins, you can create a functional and stylish scoreboard. Add some color to the pins with nail polish and label the board for a complete gaming experience.
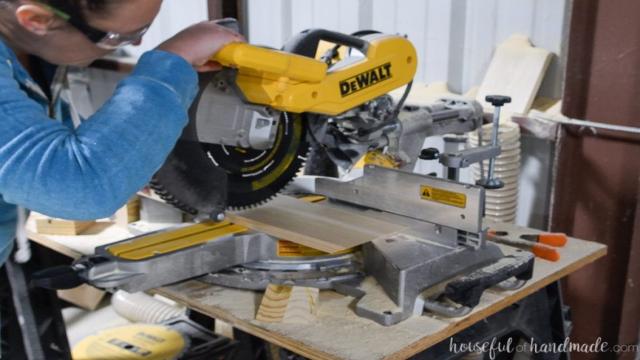
How to Build a Tabletop Cornhole Game
Tools Needed:
- Miter saw
- Brad nail gun
- Drill
- 2″ Forstner drill bit
- Measuring tape
- Sander
- Optional: Palm router
- Optional: Kreg shelf pin jig
- Optional: Silhouette Cameo
Supplies:
- 1×6 board
- Scraps of 2×2 board
- 1 1/4″ brad nails
- Wood glue
- (2) 5mm straight shelf pins
- Vinyl or paint for decoration
- Nail polish
- Fabric for bean bags
- Beans
- Needle and thread
Cut the Pieces
To start, cut one 30″ piece from the 1×6 board. Then, cut two 10″ pieces with a 60-degree angle on one side. If your miter saw doesn’t cut a 60-degree angle easily, simply cut them at the highest angle it allows. From the 2×2 scraps, cut two wedges at the same 60-degree angle as the other boards.
Assemble the Game Board
Begin by drilling holes in the top of the cornhole boards. Mark 2″ down from the top of the non-angled side of each board and mark the center of the board across it. Use these markings as guidance to drill a hole straight through each board. To prevent tear out, place a scrap piece under the board when drilling.
Next, attach the 2×2 wedge to the back of the 30″ board. Make sure it is centered and flush with the back of the board. Use wood glue and brad nails to secure it. Flip the board over and secure it with two more nails from the bottom. Take caution with the nails on the front of the wedge to avoid them poking through the underside.
Finally, attach the cornhole boards by adding wood glue to the angled part and the top of the wedge. Align the boards so they are flush with the wedge and the angle lines up with the bottom board. Secure everything with brad nails. Be mindful of the nail placement on the angled board to prevent them from poking through the bottom.
Adding the Scoreboard
To add the scoreboard, drill 5mm holes in the center of the board using a Kreg shelf pin jig. If you don’t have a jig, you can use a drill press or freehand the holes. The jig makes it easy to drill 5 shelf pin holes, then shift it to drill 5 more holes in the center of the first set. You can add more holes to extend the scoreboard if desired.
Decorate the Cornhole Boards
Now comes the fun part! Seal the wood with rub-on polyurethane, then get creative with your decorations. Use a Silhouette Cameo to cut out vinyl designs or apply paint directly to the boards. For added flair, paint the tops of the shelf pins with nail polish in different colors. Let everything dry thoroughly before proceeding.
Make the Bean Bags
To make the bean bags, cut four pieces of fabric in each color, measuring 2 1/4″ wide by 4″ long. Fold them in half with the right sides together and sew along two sides with a 1/4″ seam. Turn the bean bags right-side-out and fold over the remaining open side’s seams. Sew half of this seam closed. Fill the bag with 1 tbsp of dry beans, then finish sewing the seam closed. Repeat these steps for a total of four bean bags in two different colors.
Time to Play!
Now that your tabletop cornhole game is complete, it’s time to find an opponent and start playing! Get ready for endless fun and friendly competition. Challenge each other by throwing the bean bags in unconventional ways or adding new rules to the game. Remember to relax, have fun, and enjoy the excitement this DIY creation brings to your game nights.
Happy building! And don’t forget to visit Ratingperson for more engaging content and exciting DIY projects.